


Installation of Node Js
Setting up the Node Development Environment
The Node Js can be installed in multiple ways on a computer. The approach used by you depends on the being development terrain in the system. There are different package installer for different surroundings. You can install Node.Js by grabbing a dupe of the source law and collecting the operation. Another way of installing Node is by copying the GIT depository in all the three surroundings and also installing it on the system.
Install Node.Js On Windows (WINDOWS 10)
You have to follow the following steps to installation of Node Js on your Windows
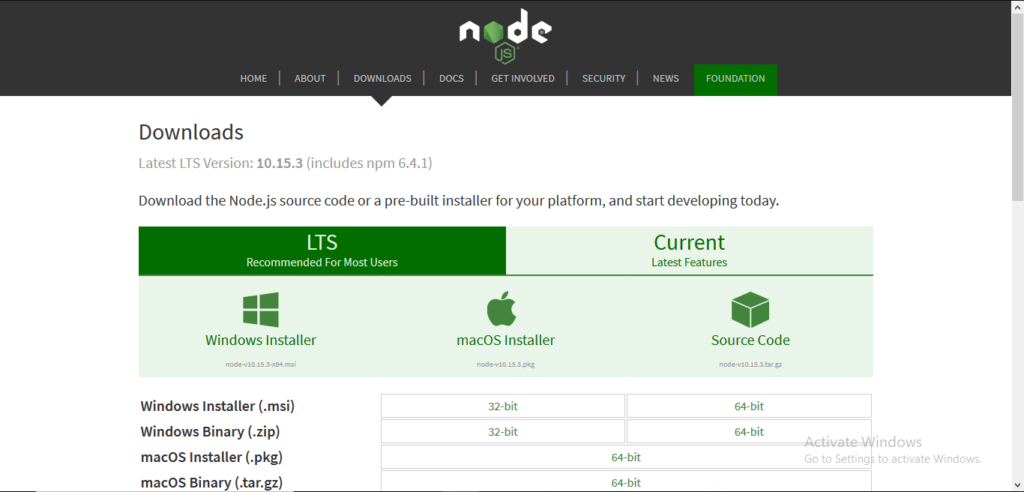
Step-1: Downloading the Node.js ‘.msi’ installer.
The first step to install NodeJs on windows is to download the installer. Visit the official Node.js website i.e) https://nodejs.org/en/download/ and download the .msi file according to your system environment (32-bit & 64-bit). An MSI installer will be downloaded on your system.

Step-2: Running the Node.js installer.
Now you need to installation of Node Js installer on your PC. You need to follow the following steps for theNode.js to be installed…
- Double click on the .msi installer.
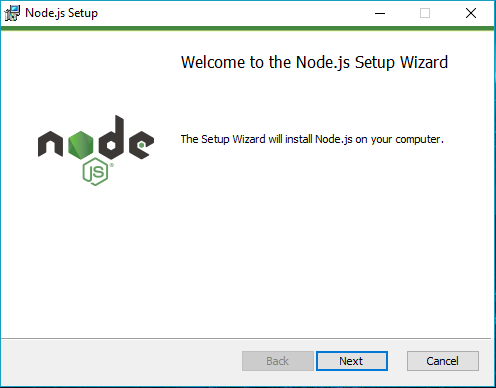
The Node.js Setup wizard will open.
- Welcome To Node.js Setup Wizard.
Select “Next”

- After clicking “Next”, End-User License Agreement (EULA) will open.
Check “I accept the terms in the License Agreement”
Select “Next”


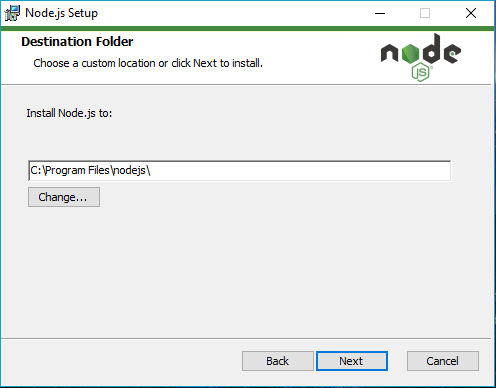
- Destination Folder
Set the Destination Folder where you want to install Node js & Select “Next”
- Custom Setup
Select “Next”


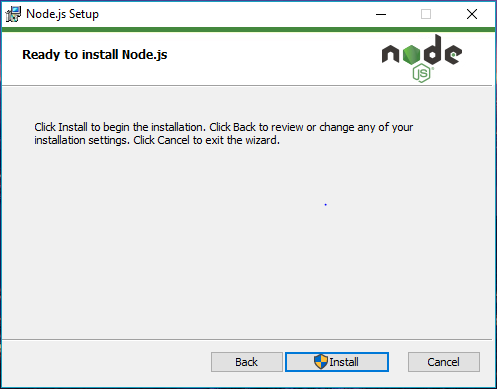
- Ready to Install Node.js.
Select “Install”
NOTE
A prompt saying – “This step requires administrative privileges” will appear.
Authenticate the prompt as an “Administrator”
- Installing Node.js. Do not close or cancel the installer until the install is complete.
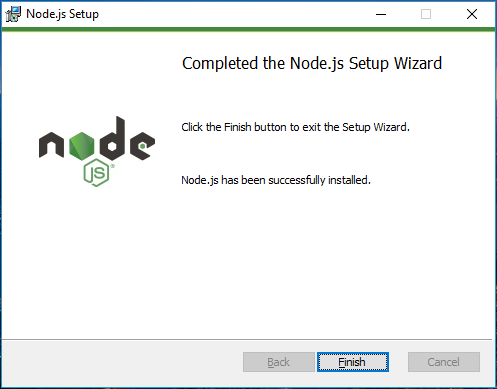
- Complete the Node.js Setup Wizard.
Click “Finish”
Step 3: Verify that Node.js was properly installed or not.
To check that node js was completely installed on your system or not, you can run the following command in your CMD or Windows Powershell and test it.
C:\Users\Admin> node -v
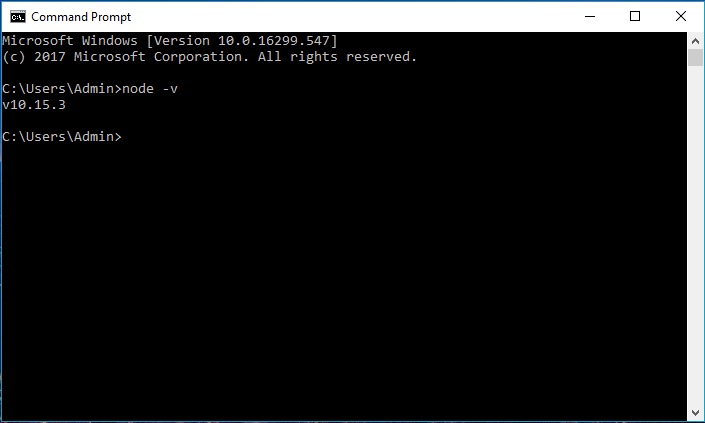
If node.js was completely installed on your system, the CMD will print the version of the node.js installed.
Step 4: Updating the Local npm version.
The final step in node.js installed is the updation of your local npm version(if required) – the package manager that comes bundled with Node.js.
You can run the following command, to quickly update the NPM
npm install npm –global // Updates the ‘CLI’ clientNOTE
- You do not need to do anything to the system variables as the windows installer takes care of the system variables itself while installing through the .msi installer
- If you use any other format for installing nodejs on your PC, you should put the system variable path for node.js as follows:
PATH : C:\Users\[username]\AppData\Roaming\npm
C:\Program Files\nodejs (Path to the nodejs folder)